On this page
Sweet for ArcGIS is available to use within ArcGIS Online as well as on premise within ArcGIS Enterprise. To access Sweet for ArcGIS, please follow these instructions:
Sweet for ArcGIS is available to use on premise within ArcGIS Enterprise. To access Sweet for ArcGIS, please follow these instructions:
- In a web browser, navigate to https://www.esriuk.com/en-gb/store/marketplace/Sweet-for-arcgis.
- Sign in with an ArcGIS Online account (the named user must have purchasing privileges).
- In the list of items, find the item for Sweet with the correct named user type you require.
- On the Sweet page listing click on the Purchase Request button.
- Fill in all the fields in the form and confirm the purchase request.
Once your request has been granted, further steps need to be carried out to enable users to access Sweet. These are different depending on where you wish to deploy the software.
ArcGIS Named User Type prerequisites
Specific ArcGIS Named User Type licenses are required to assign and use Sweet licenses. The below matrix summarises the Sweet capabilities enabled by each ArcGIS role-based user type.
For more information on which user types are required by your organisation, please contact your Account Manager.

ArcGIS Online licensing
- In a web browser, navigate to your organisation’s ArcGIS Online home page and Sign In using an Administrator account.
- Sweet is licensed by member. To assign licences to members of your organisation navigate first to the Organization page then click on the Manage add-on licences link.
- Sweet will be listed under Applications. Find it, then click on the Manage link.
- A popup dialog will show – simply select the users you want to be able to use Sweet. On each user’s next login they will see Sweet in their list of available apps accessible through the App Launcher.
ArcGIS Enterprise licensing
Generate a licence file
Once you have bought Sweet you need to create a licence file for each server where Sweet is installed. To do this:
- In a web browser, navigate to the Esri UK self-service licensing portal – https://apps-licensing.esriuk.com/.
- Sign in with your ArcGIS Online account (the one you used when purchasing Sweet from ArcGIS Marketplace).
- Click on the Create Licence button for Sweet.
- In the form on the page, enter the URL(s) of the server where Sweet is installed.
- Click on the Get Licence File button. The file will be generated and the screen will update.
- Click on the Download Licence File and save the file to a local file or network location. You are now ready to move on to the Install a licence step below.
Install a licence
To install the licence on the server you must have access to the file system on the server where Sweet is installed. Once you have accessed the server’s file system do the following:
- Navigate to the folder where the Sweet client is installed (it may be named web).
- Locate the appconfig folder.
- Copy your license.json file into the appconfig folder.
- Restart your web server.
Group Access
Once the licence is successfully installed, Sweet must be configured to allow users access the builder and applications. This process must be completed by someone with administrative access to the portal and ownership of the Sweet Builder item in the portal.
Administrator Group
- Log in to your ArcGIS Enterprise portal.
- Create a group named Sweet Administrators with the following options selected:
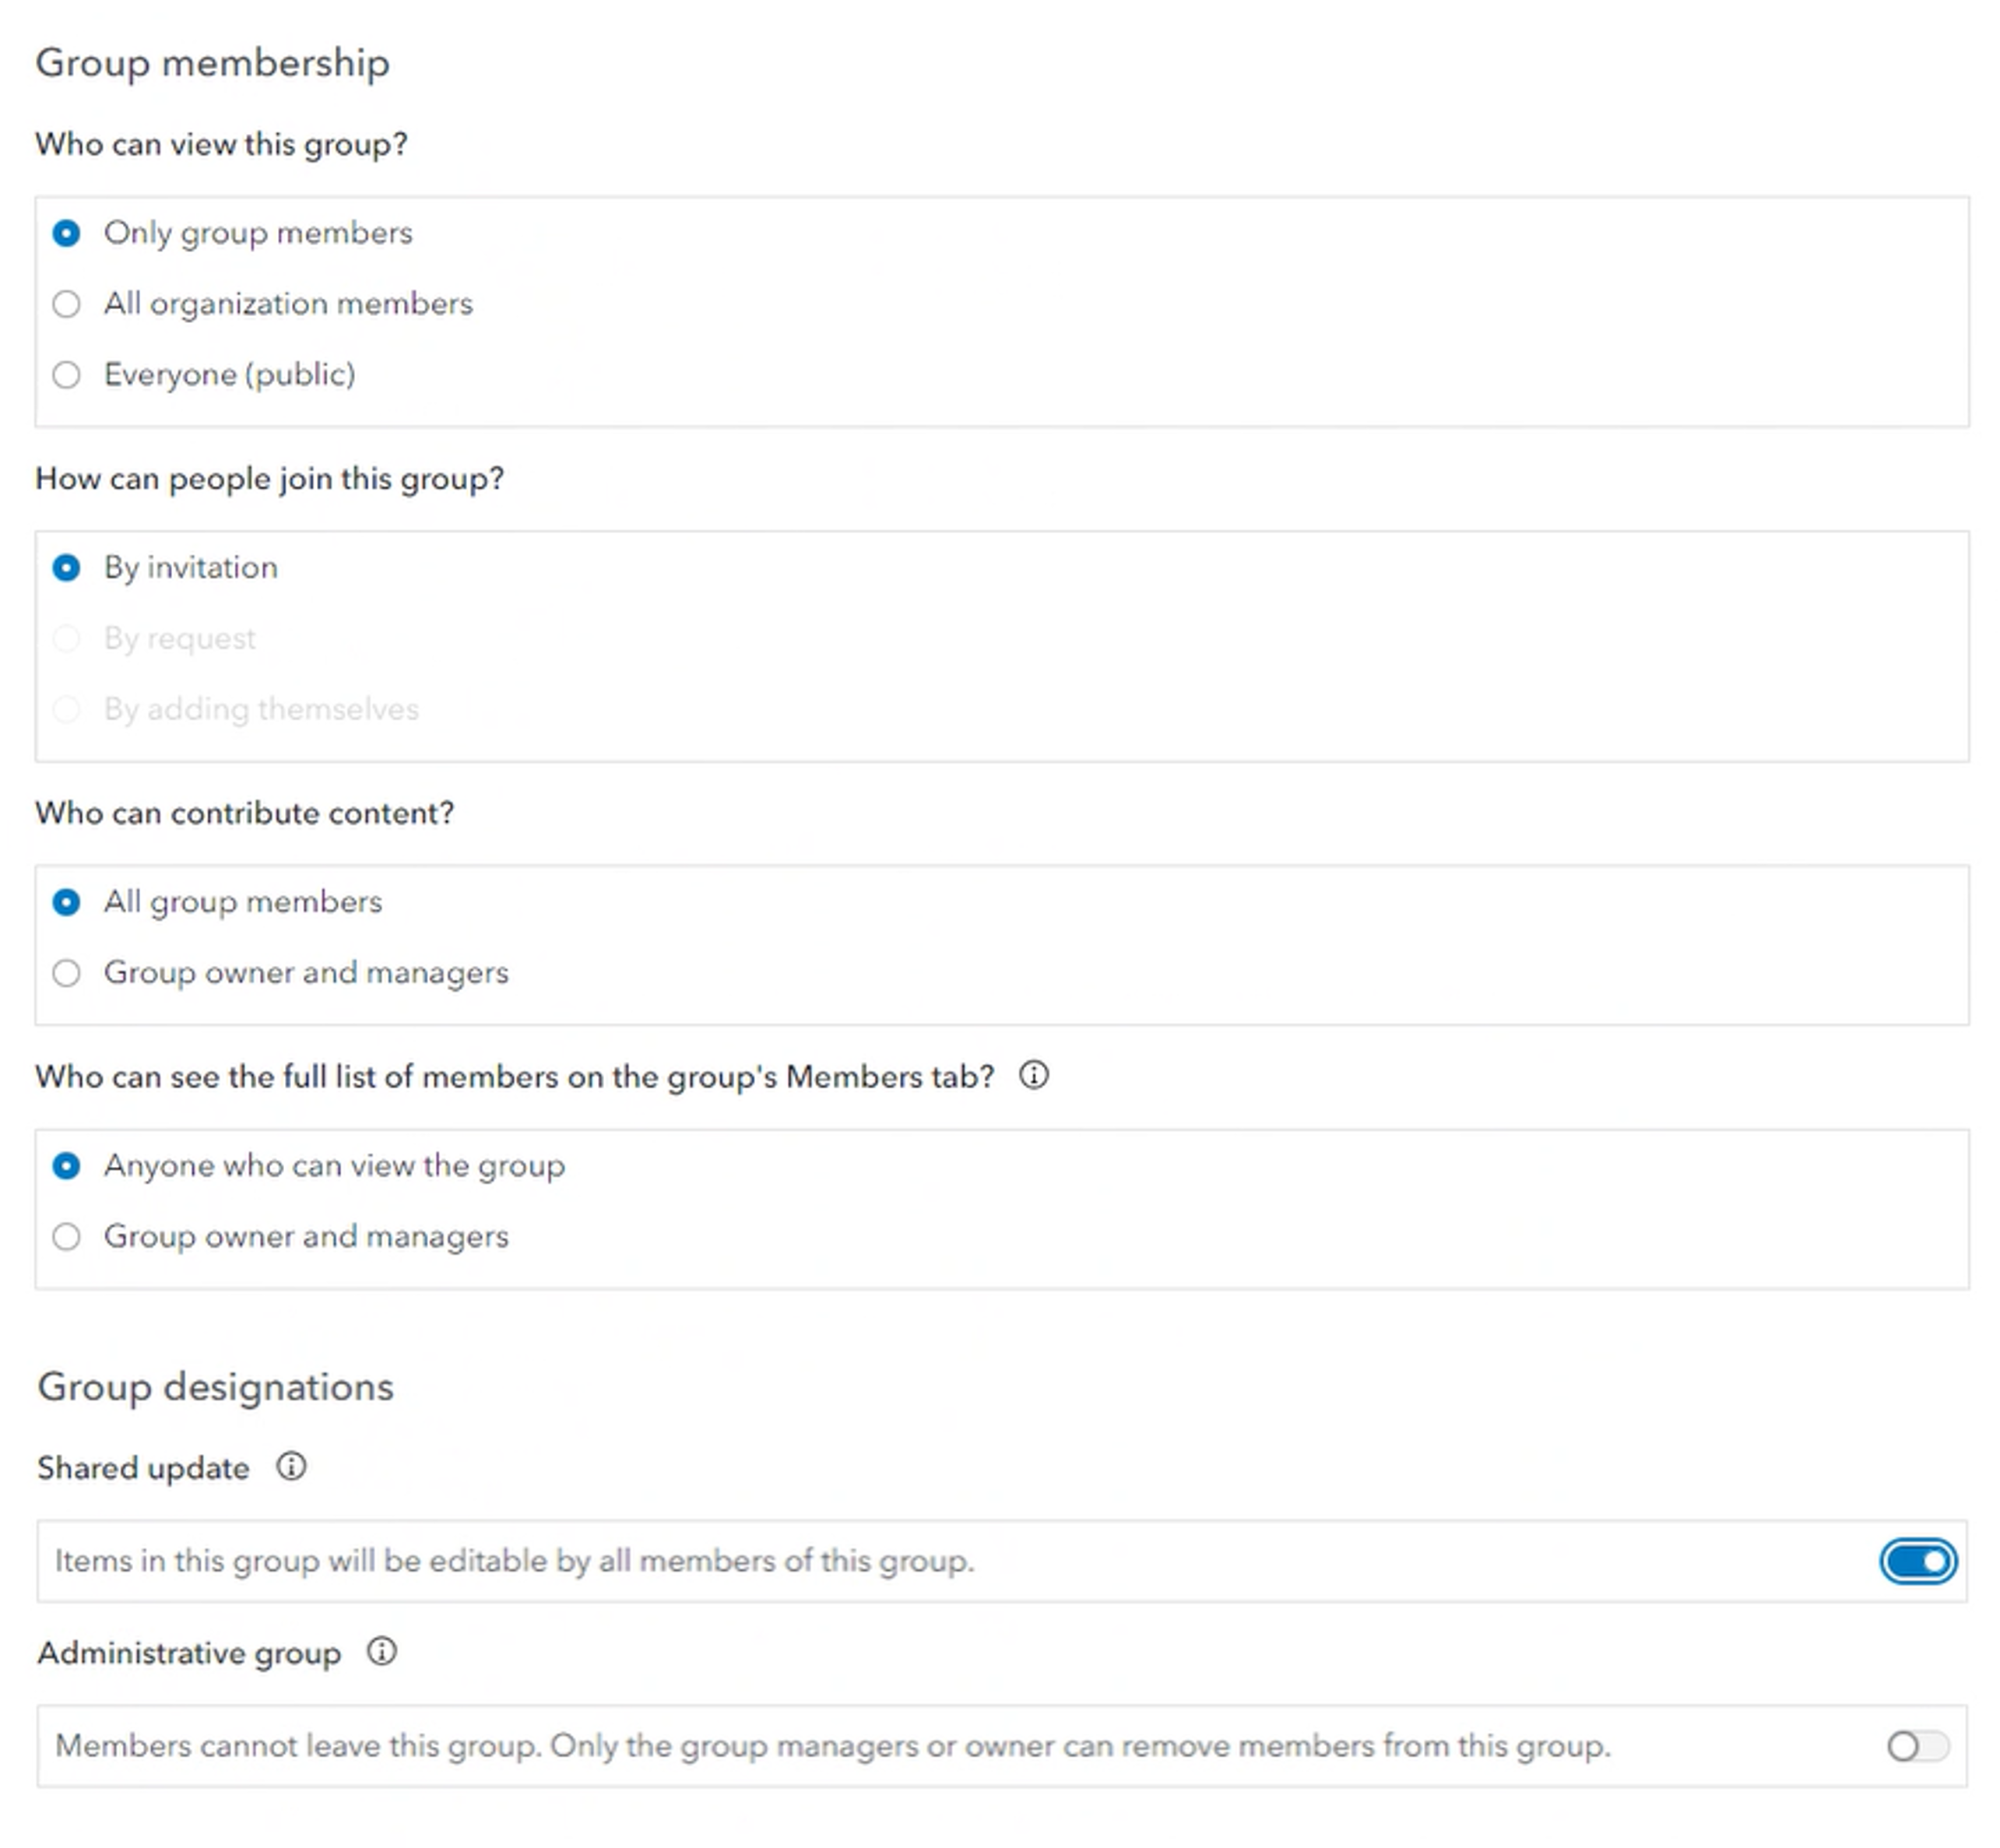
- Share the Sweet portal item with the Sweet Administrators group, ensuring the Shared Update option is selected.
- Add any users who should have the ability to administer Sweet licences as members to this group.
User Group
- Create another group named Sweet Users. This group will contain all of the users who should have access to Sweet.
- Give the group the following options:
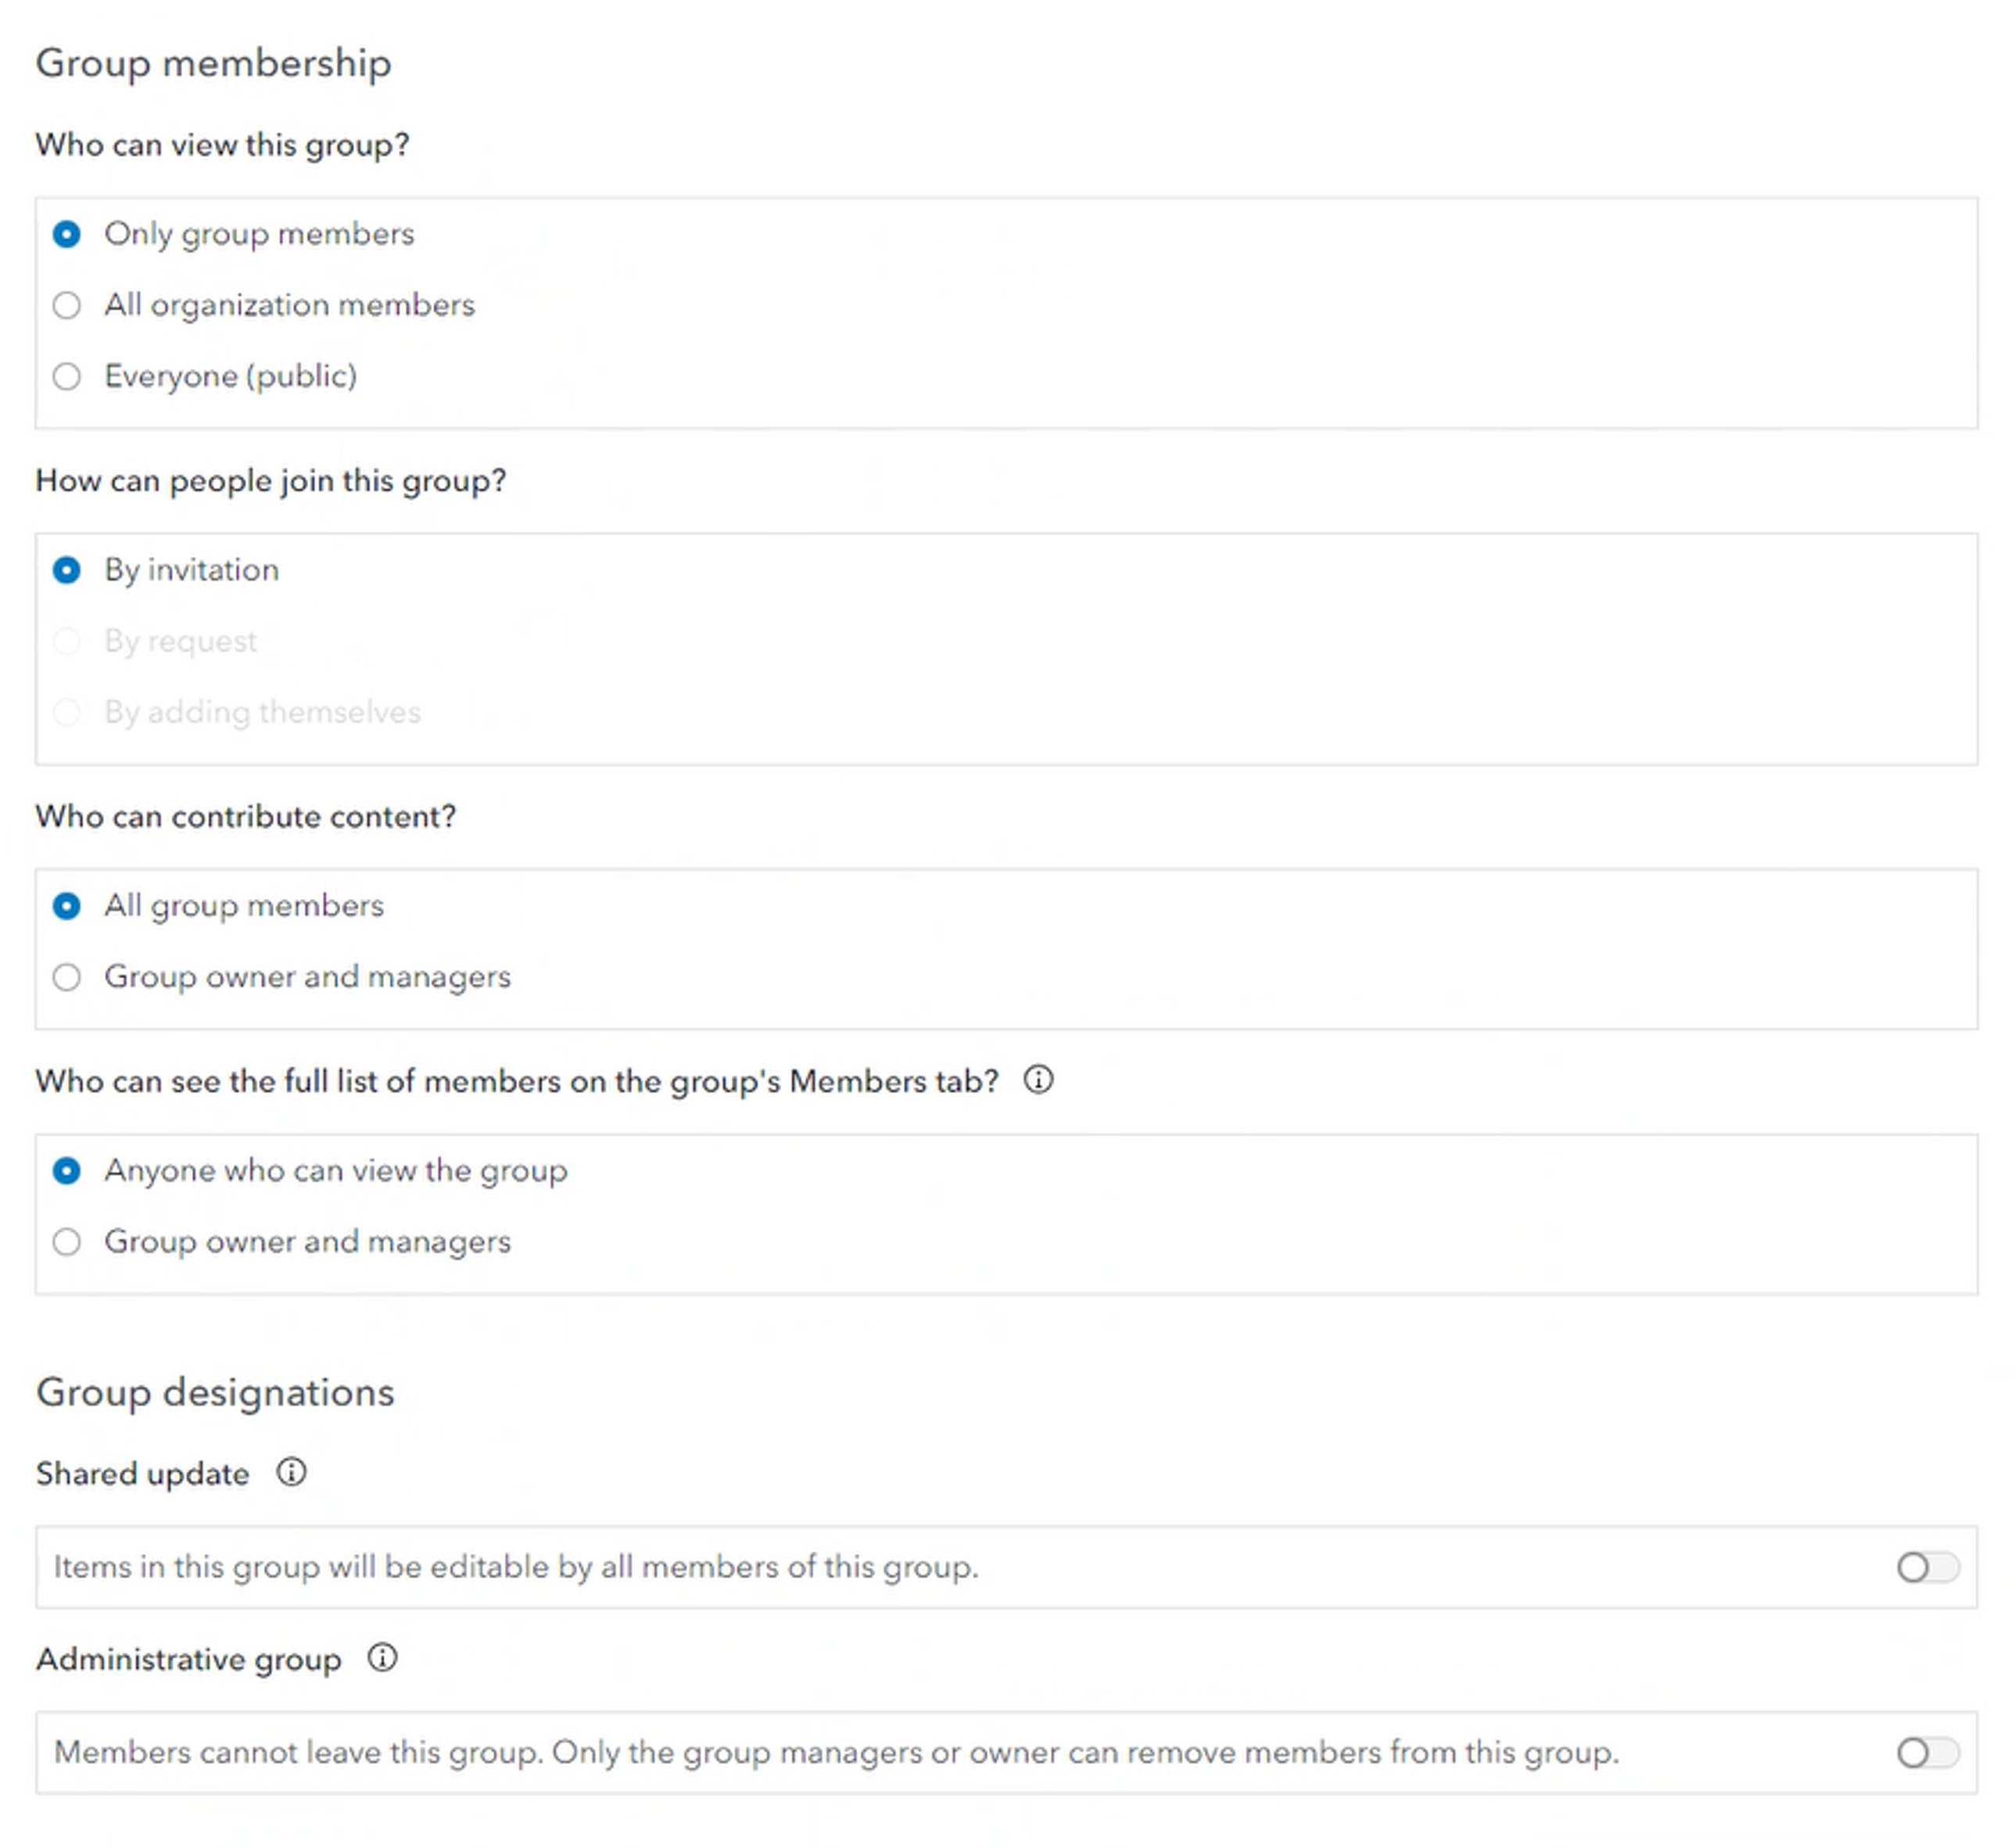
- Share the Sweet portal item to this group as well, but do NOT select the Shared Update option. The group sharing dialog should look as follows:

- Add any users who should have access to Sweet to this group.
Assigning Licences
After the licence has been installed and the portal groups created you can allocate the individual user licences. Please note that the owner of the Sweet portal item will automatically be allocated one user licence. To allocate user licences:
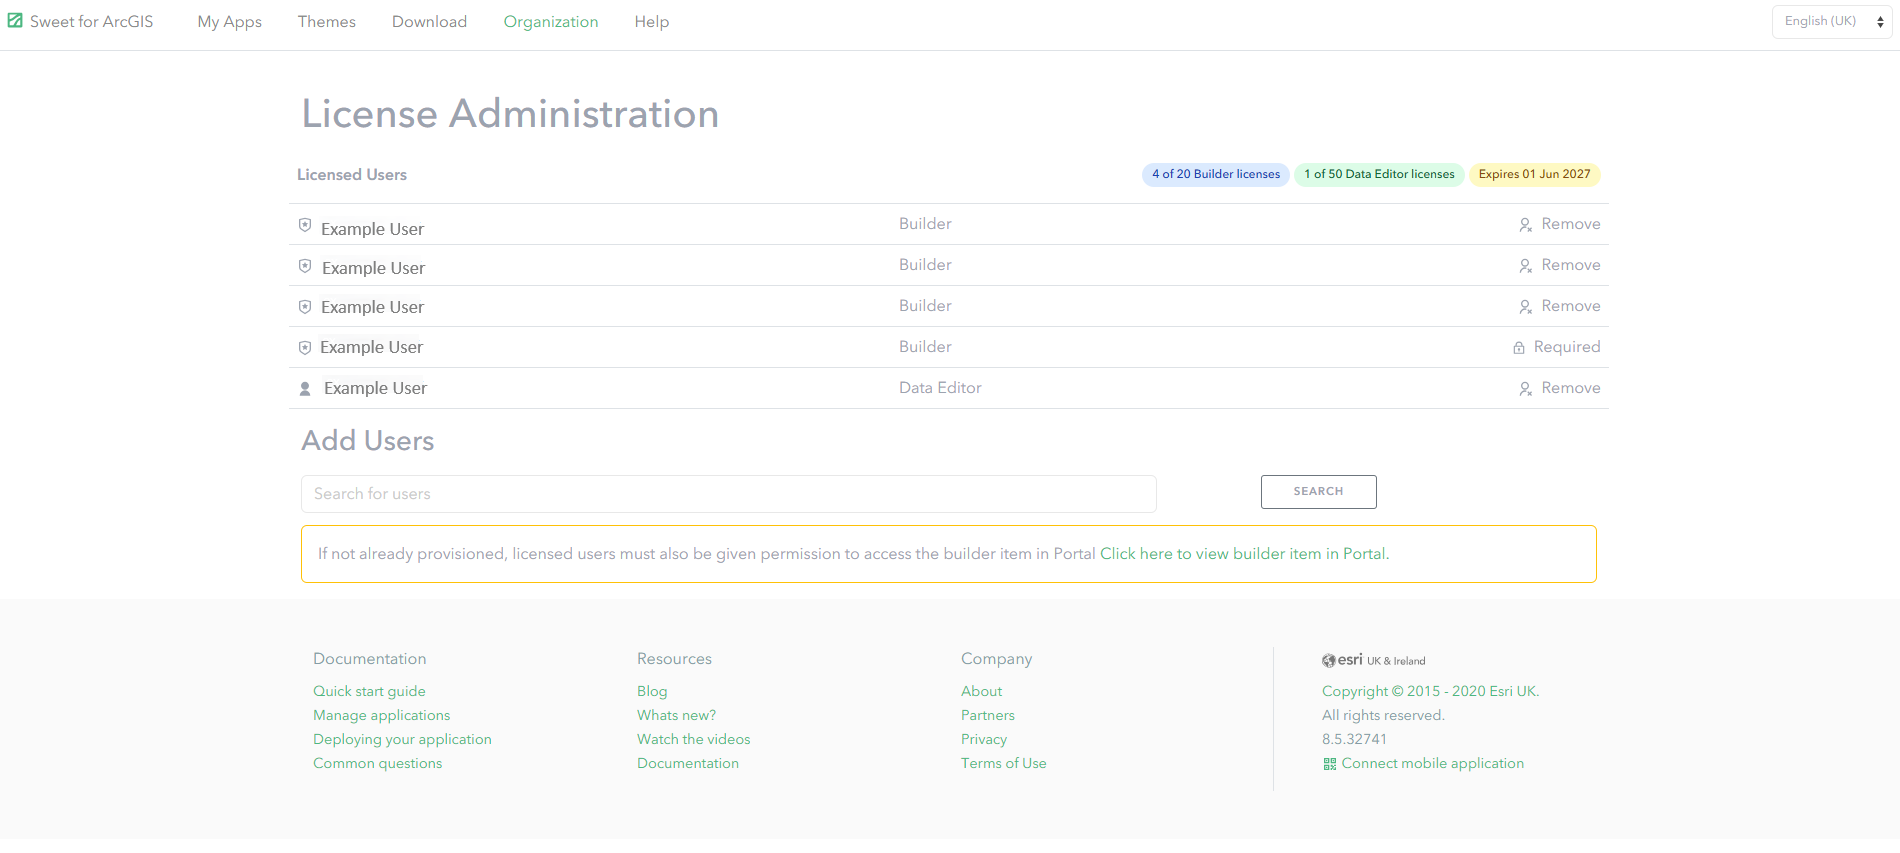
- Navigate to Sweet Home.
- Click the Organization link at the top of the page.
- Enter the names of those who should be allocated licences in the Add Users search box.
- Add the correct license type based on user type and organisation license provision.
Each user that is added will receive a licence and will be able to access Sweet.
Licensing through the command line interface (CLI)
The CLl allows licenses to be be managed through a command line. Licenses can be assigned / removed for individual users, or for multiple users at a time through bulk update. The following command is needed to manage licenses, in combination with the parameters listed below.
sweetcmd license-users
Portal Username (optional if using token)
It must be an account with admin access to the builder item in the portal
-u or --username
Portal password (optional if using token)
The password belonging to the username.
-p or --password
The URL of the portal (required)
This must end in /portal/sharing.
-a or --arcgisportal https://...
The provisioningAppId (required)
-i or --itemid
User list (optional)
A comma-delimited list of usernames required for add/delete operations. No spaces are allowed in the list.
-s or --userlist "joeblogs,janedoe"
Root URL (required)
This is the same as rootStem from the appconfig.js file.
-r or --rooturl https://...
URL to license JSON (required)
This is the exact URL to the license.json file in the web/appconfig folder — ie. https://www.THESERVER.com/sweet/appconfig/license.json.
-l or --licenseurl https://....
Product ID (required)
This will be fc5a6c7852824126aa82f400e131953b.
-d or --productid fc5a6c7852824126aa82f400e131953b
License action (optional)
-t or --licenseaction list
Choose either list, add, or delete. List is the default.
The license type (optional)
When adding a new user license specify either builder or dataEditor as the license type. If no type is specified builder will be used.
-y or --licensetype builder
Token (optional if using username/password)
This can be used instead of username/password.
-z --token
Only keep users in file (Required for updateLicense. Either Y or N)
Required for updateLicense
-k --onlykeepusersinfile
For example, the command to list users could be written as:
sweetcmd license-users -u username -p password -a https://YOUR.URL/portal/sharing -i b7f825da46d14bb2abdd77yz787878z -r https://YOUR.URL/sweet/ -l https://YOUR>URL/sweet/appconfig/license.json -d fc5a6c7852824126aa82f400e131953b -t list
For example, the command to list all licenses (export licenses as a csv) could be written as:
sweetcmd license-users -u username -p password -a https://YOUR.URL/portal/sharing -i b7f825da46d14bb2abdd77yz787878z -r https://YOUR.URL/sweet/ -o y -d fc5a6c7852824126aa82f400e131953b -t listandexport c:\temp\licenseList.csv
The command to add one or more users could be written as:
sweetcmd license-users -u username -p password -a https://YOUR.URL/portal/sharing -i b7f825da46d14bb2abdd77yz787878z -r https://YOUR.URL/sweet/ -l https://YOUR>URL/sweet/appconfig/license.json -d fc5a6c7852824126aa82f400e131953b -t add -y dataEditor -s "joeblogs,andysmith,darrenbrown"
The command to add/update licenses via CSV could be written as:
sweetcmd license-users -u username -p password -a https://YOUR.URL/portal/sharing -i b7f825da46d14bb2abdd77yz787878z -r https://YOUR.URL/sweet/ -d fc5a6c7852824126aa82f400e131953b -k N -t updatelicenses /addyour/filepath/here/temp.csv
The command to delete one or more users could be written as:
sweetcmd license-users -u username -p password -a https://YOUR.URL/portal/sharing -i b7f825da46d14bb2abdd77yz787878z -r https://YOUR.URL/sweet/ -l https://YOUR>URL/sweet/appconfig/license.json -d fc5a6c7852824126aa82f400e131953b -t delete -s "joeblogs,andysmith,darrenbrown"
Assigning Licences via CSV
After the licence has been installed and the portal groups created you can allocate the individual user licences. Please note that the owner of the Sweet portal item will automatically be allocated one user licence. To allocate user licences:
- Use the list all licenses (export licenses as a csv) command using the CLI to download a CSV list of all the licences.
- Swap out the .json licence file (upgrade it).
- Adjust the CSV which you downloaded in step 1– remove licences and users and/or change licence types for users.
- Use the CLI command for add/update licenses via CSV to implement the changes you made in the CSV. The path to the updated user list file should be appended to this CLI command.