On this page
In Sweet for ArcGIS, an editor can switch between different drawing modes as they digitize a new feature. For example they can draw the straight sides of a building using the Standard (vertex) mode and then switch to the Curve drawing mode to draw a segment of a wall that is curved.
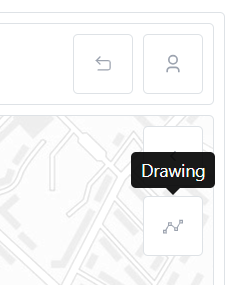
The active drawing mode button is shown in the top right hand corner of the application when in Create mode. Clicking on the button opens up a list of available drawing mode options that a user can select to use.

Configuring drawing modes
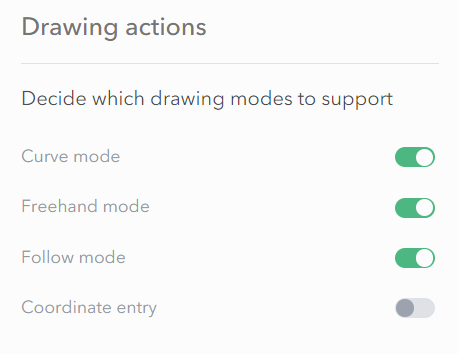
The Standard mode is automatically available with each app. Curves, Freehand, Follow, and Enter coordinates can be configured through the Drawing actions button in the builder.
The Stencils drawing mode is made available by configuring and adding the Stencils Panel to your app in the builder.
Standard (vertex) mode
Records a vertex at each click.
Curve mode
Curve mode allows a user to define the first and last vertex and the height of a curve. Note that Sweet for ArcGIS does not support true curves.
Freehand mode
Freehand mode will allow a user to capture continuously whilst using a mouse or touch device.
Follow mode
Follow mode allows a user to follow along the edges of existing geometry in the map when constructing a new feature. Highlighting indicates to the user which edges is being followed, and vertices will be automatically generated along the edge.
Stencils
Stencil draw mode allows users to pick from a predefined list of stencils of which to construct the feature.
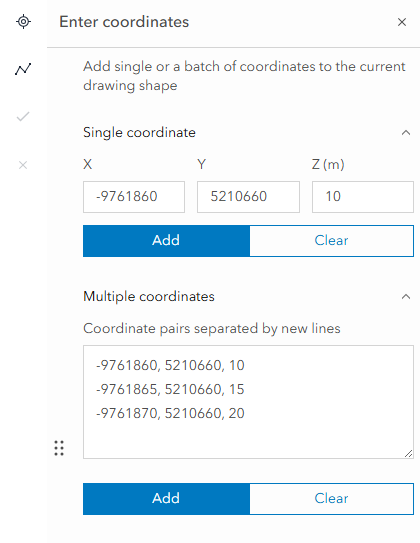
Coordinate entry
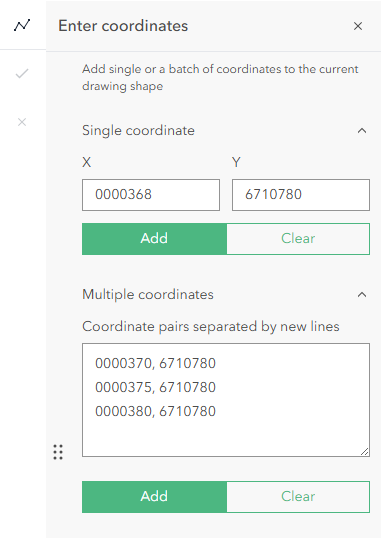
Coordinate entry allows a user to stipulate either one or multiple coordinate pairs to construct a feature. It is also possible in the builder to allow a user to choose from multiple coordinate systems. Multiple coordinates must be entered in the form X,Y separated on new lines and can not be used with point features.
Z enabled UNE
It is possible to specify an X, Y and Z value in the coordinate entry.
In Single coordinate mode, for features where Z Alignment is set to ‘Same value‘, the ability to input a Z value will disappear after the first vertex is entered during an edit.
In Multiple coordinate mode, for features where Z Alignment is set to ‘Same value‘, the first Z initialised will be used for the subsequent vertices if the Multiple coordinate entry option is used.
Enabling multiple coordinate systems
Please be aware that this is an app wide setting and therefore would allow users to also choose from multiple coordinate systems if using Plans functionality.
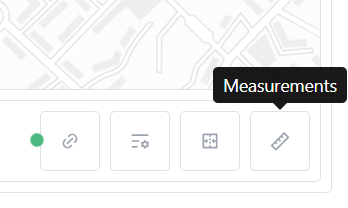
- Open the Measurements panel.
- Expand Coordinate Systems.
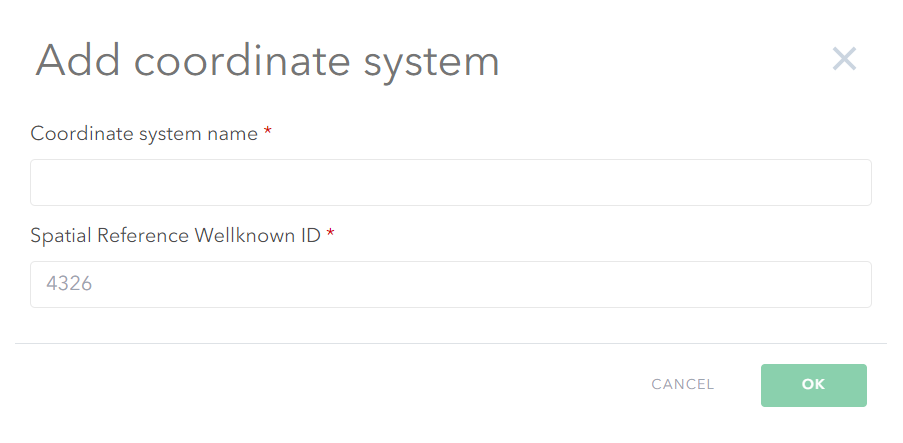
- Using the Add button, add a new coordinate system.
- Give the coordinate system an appropriate name and add the spatial reference ID.