
On this page
Changing locking options
The multi user locking options control how multiple users can edit data within a Sweet app at any one time. There are three options available to choose: Standard, Layer, and None.
To set these options, follow these steps:
- In the Wireframe Editor, Select the Save button.
- Open the Multi user section.
- Select the Type of locking you wish to apply.
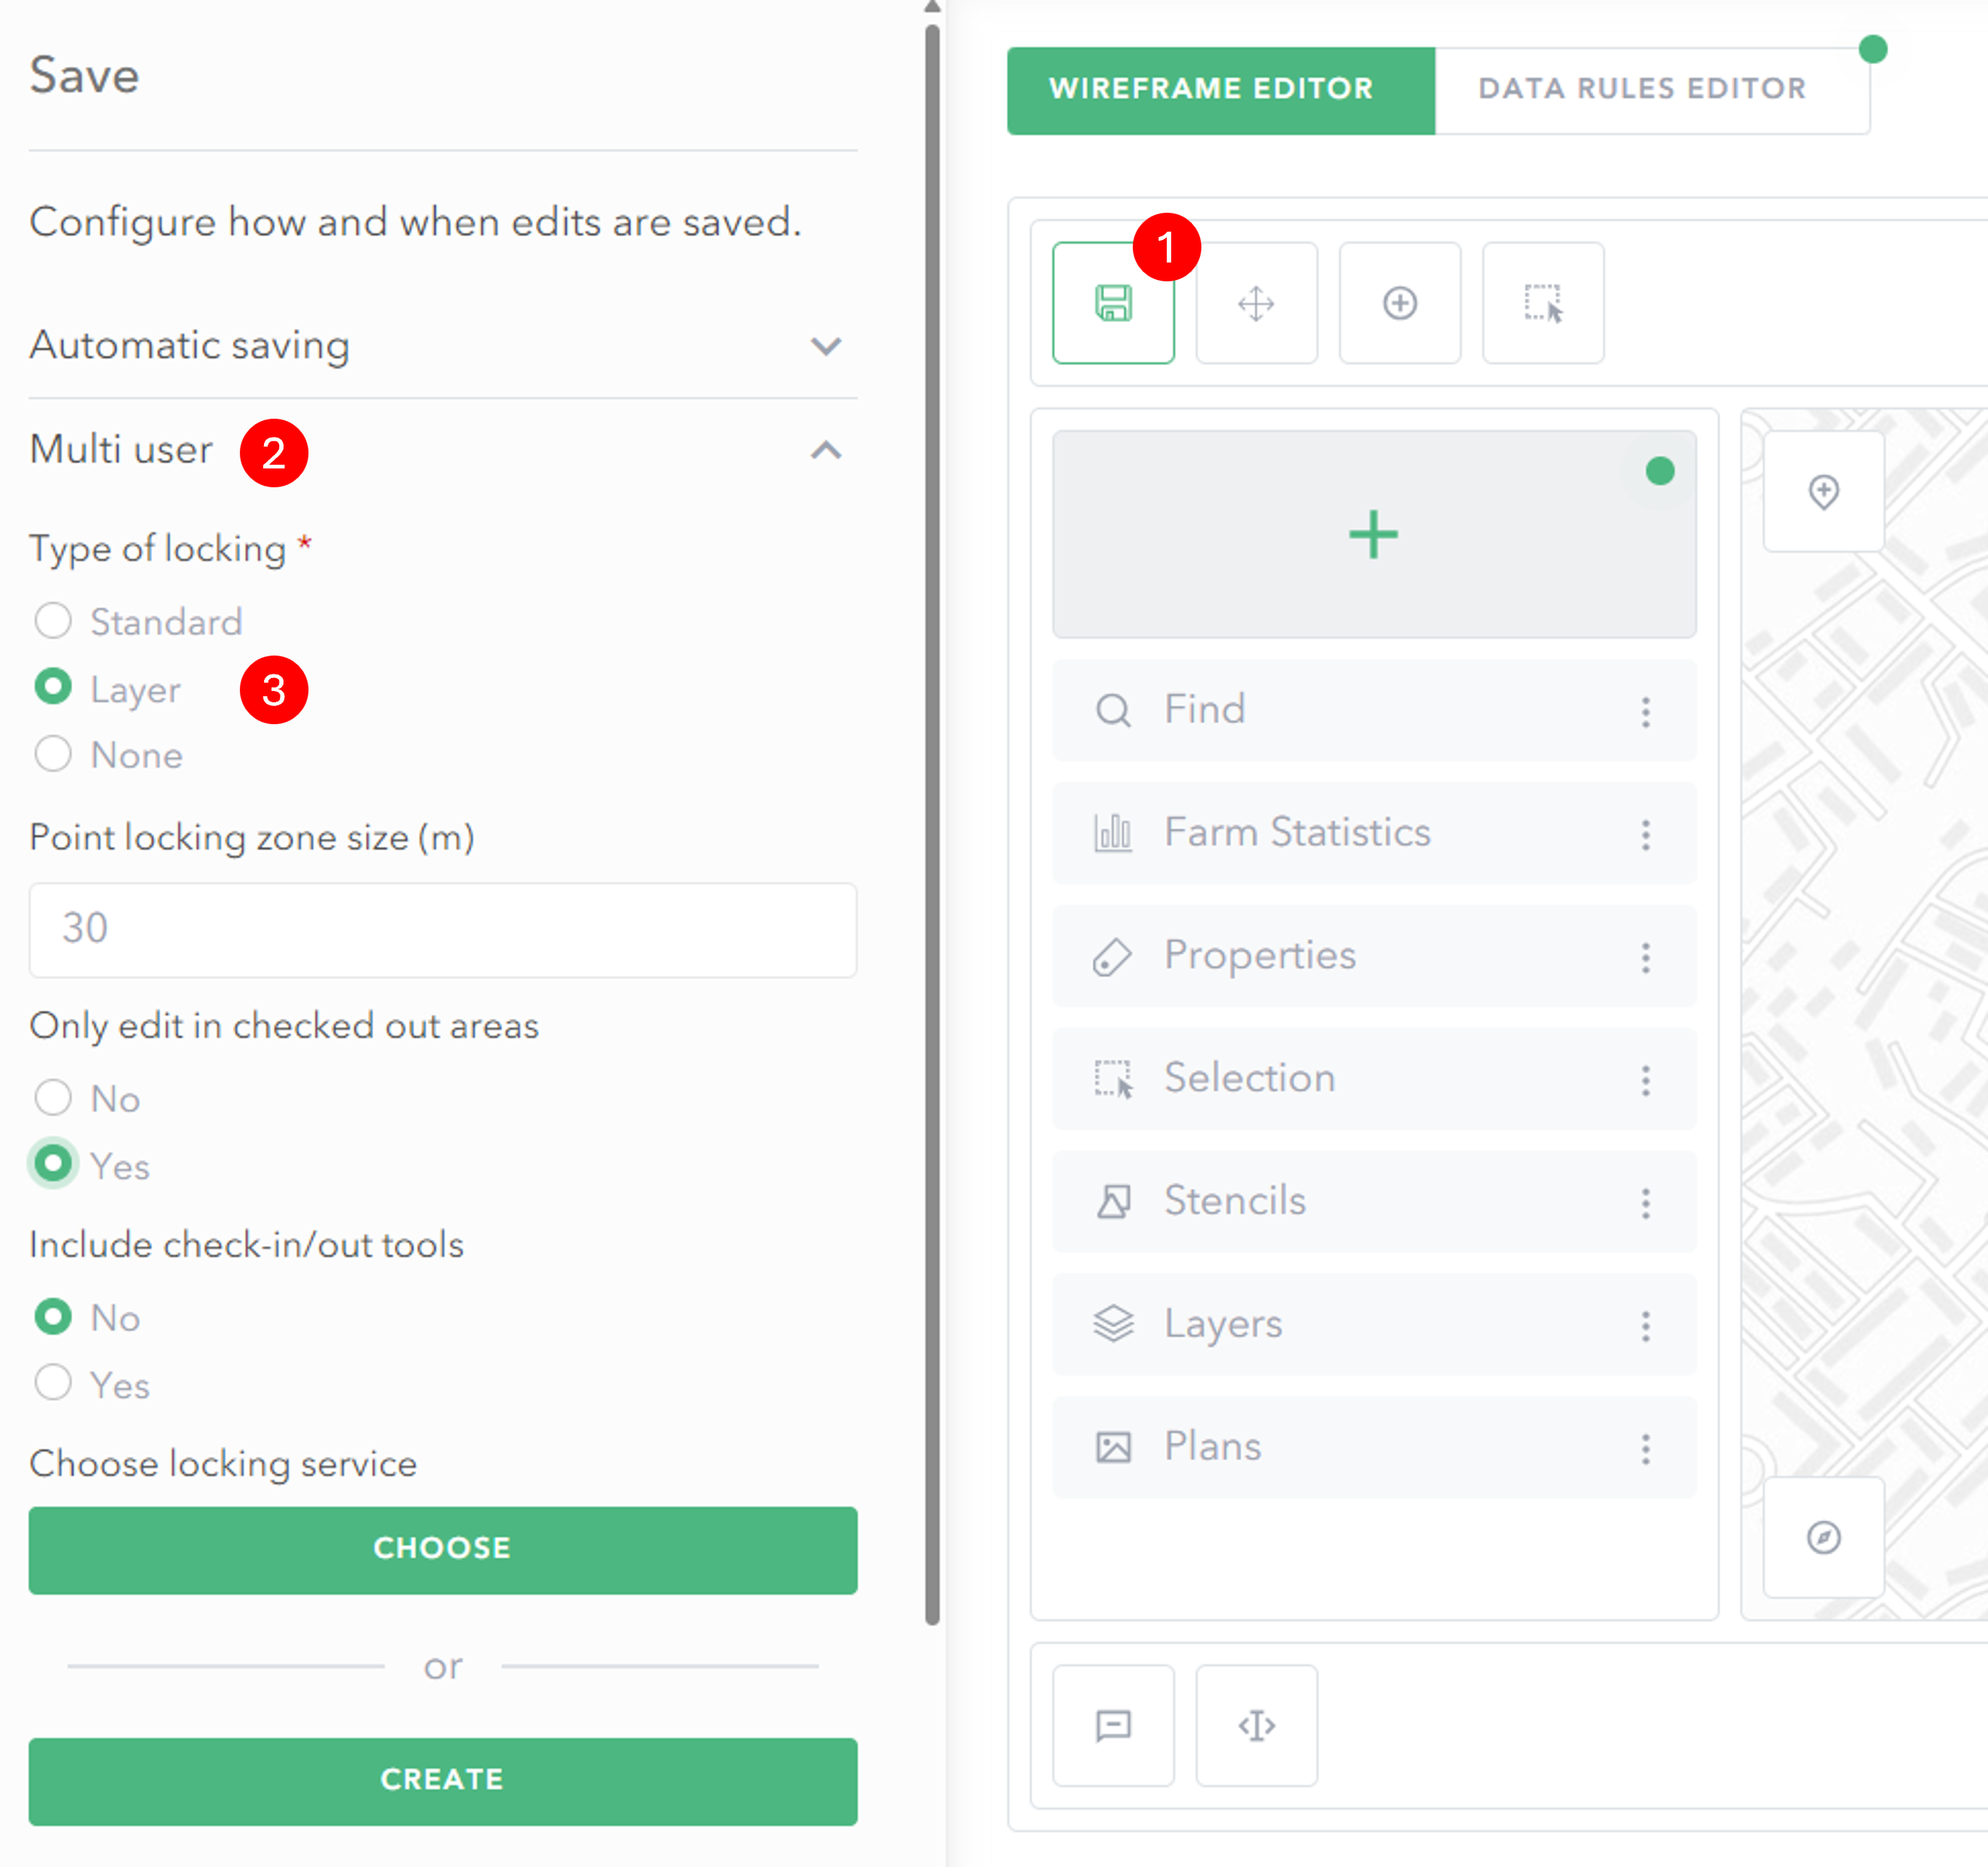
Types of locking
Standard
Standard locking is the default, and this means an editing extent is locked out for other users when an editor is actively editing and changing data. The locked out area is made up of the extent of a feature being edited plus any additional features which are topologically related to this feature. For point features, the size of the locked out area is defined by the Point locking zone size setting.
Layer
Layer locking uses a feature service in the portal to store locked-out areas. Using a locking layer is required for disconnected workflows using the Sweet for ArcGIS offline application (available on iOS/Android/Windows), or it can be used to provide greater control over the locked extents during editing. There are multiple options for layer locking available.
If Only edit in checked out areas is set to No, then online users can edit in the app without creating a locking area. However, an editing extent is still locked out from other users when an editor is actively editing and changing data. This locked-out area is defined in the same way as Standard locking.
If Yes is selected, then online users are only able to edit data within a checked-out area. The Include check-in/out tools setting controls how the checked out areas are defined.
To manually create checked out areas, select No. These areas must be defined directly in the locking layer, and the User ID of the editing user must be set for each one. Users will only be able to edit data within the checked-out area assigned to them, and the extent of that area will be locked to other users for editing. Once editing is complete the checked-out areas should be removed from the locking layer. Creating checked-out areas in this way allows non‑rectangular polygons to be used and places control for defining these areas with authorised editors of the locking layer.
To allow users to define their own checked-out areas, select Yes. This enables the check‑in/out tools for the user in Sweet. Before editing data, the user must define the checked‑out area using the Check‑out tool. The user can then create and edit data within that area, and the extent of the checked‑out area will be locked to other users for editing. Once editing is complete, the Check‑in tool is used to release the locked area for others. Giving users control of checking areas in and out provides greater flexibility during editing and helps prevent issues caused by other users making edits near their current work area.
For offline, disconnected workflows using the Sweet for ArcGIS offline application, the check‑in/out and locking of areas are carried out within the offline application itself. The Only edit in checked‑out areas and Include check‑in/out tools settings apply only to online workflows.
For layer locking, a locking service must be created to store the locked areas. Select Create to generate a new locking layer; this creates a new feature service saved in the ArcGIS organisation. If an existing feature service with the same schema is available, it can be selected using the Choose option.
None
Thirdly, there is an option to have no layer locking set within the app.